Quick Summary: Dodge Dart Turn Signal Fix
If your 2013 Dodge Dart front turn signal is blinking rapidly, it usually means 1 of 3 things:
- A bulb is burnt out
- The bulb is loose
- There is corrosion on the socket
Quick Fix Steps
- Open the hood
- Locate the turn signal housing
- Twist the bulb counterclockwise
- Check for corrosion
- Confirm you have the correct double-filament bulb
- Clean the socket if needed
- Reinstall and test
If that doesn’t work, you may need a replacement bulb or require professional help to fix this issue.
When You’ve Been Putting Off Repairs, You Start DIYing Things Yourself
So, I have a 2013 Dodge Dart, a car that’s been discontinued for years, and I had been putting off fixing my car’s front left turn signal blinker light.
Whenever I would signal that I was turning, I would hear an annoying rapid clicking sound.
My rear blinker light still worked. However, my front left blinker was the problem; people wouldn’t know if I was turning if we were facing each other until I was turning.
It’s not safe playing chicken with oncoming traffic like that.
I didn’t have enough money to pay for professional help or the time to go to a mechanic shop, and I figured that I could treat this problem like an oil change—change it myself.
It’s a small light, but driving without it made me feel unsafe and frustrated every time I hit the blinker.
I knew I could pay a mechanic when I had the money, but I wanted to try fixing it myself—and maybe save some cash and time in the process.
Disclaimer: I Am Not A Mechanic
I am not a mechanic and I’m not formally trained to diagnose automobile issues.
I didn’t go to a shop because I didn’t have the time or money, so I troubleshot the problem myself and figured it out along the way.
Here’s what I learned by fixing my own blinker light.
Tools To Have On Hand to Change Your Blinker Light
Before I tackled my blinker light on my own, I made sure that I had a few things on hand:
- My phone (for YouTube guidance)
- Spare gloves (keeps my hands clean)
- A multi-tool (for leverage or prying)
- A flashlight (for hard to reach spots)
- And spare blinker bulbs (ESSENTIAL!!!)
The gloves helped to keep my hands clean from directly touching whatever I would find under my hood.
My multi-tool would be handy just in case I needed leverage.
A flashlight to see better where broad daylight might not shine in the right spots.
And you can’t change your blinkers without spare bulbs.
My Step-By-Step Process to Avoid Spending 2 Hours on a 5 Minute Problem
We have our tools.
We know what problem needs fixing.
Now we can get started.
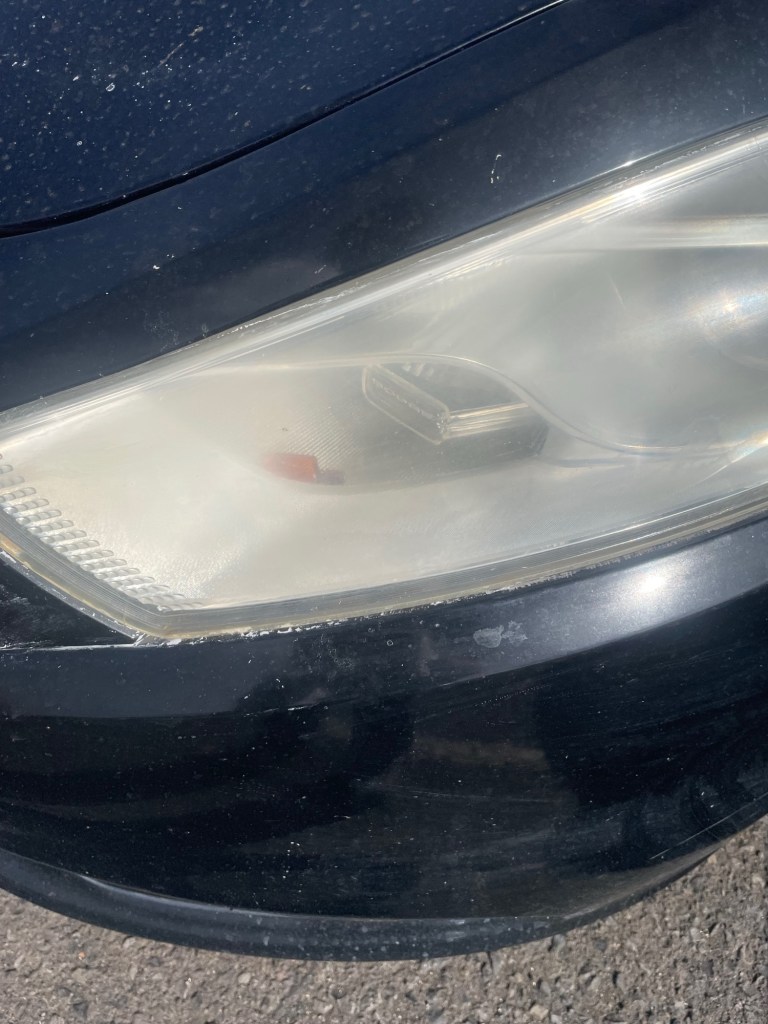
First thing you need to do is pop open the hood. The blinkers are accessible underneath the hood of the car, not from the blinkers themselves in the front.
Next step is to open YouTube to troubleshoot the problem. I watched a YouTube video from Electrical Car Repair LIVE, called, “DODGE DART FRONT TURN SIGNAL LIGHT BULB REPLACEMENT AND SIZE.”
I followed the video, found where the blinkers are housed, then I pulled the blinkers bulb out by twisting counterclockwise and out of its housing.
My bulb wasn’t burnt out, but I found white residue along the base of the bulb and on the socket. That’s corrosion and oxidation of the metal. It’s supposed to be normal, but take my word with a large sack of salt.
With my glove and multi-tool, I had spent more than 10 minutes trying to pry my blinker bulb out without cracking the bulb or damaging the socket.
I had used a dull knife from my multi-tool to gently scrap the corrosion off of the bulb and the socket, pulling and jiggling it, to loosen.
When the bulb came free, I kept it just in case. I had 2 replacement bulbs in my car, so it should have been an easy fix, right?
Not for me.
I had spent 2 hours fighting with my replacement bulbs because they wouldn’t set into the socket. It would go in half-way, then it would fall out.
Let me show you what happened to one of my replacement bulbs.
The reason why I had spent 2 hours fighting with my replacement bulbs was, not because of the corrosion or that my bulb socket was damaged, because my replacement bulbs were single prong filaments.
My Dodge used double prong filament bulbs.
I even called my dad—not for answers, just to talk—and he asked, “Did you check the bulb?” I hadn’t. That simple question saved me hours if I had thought of it earlier.
Since I didn’t have the correct replacements, and my original bulb wasn’t burnt out and it was covered in corrosion, I used my gloves and the dull knife to scrape off the white substance to ensure conductivity was possible again.
Thankfully, it worked out.
Once the corrosive matter was cleaned from the bulb and the socket, I fit my existing bulb back into its socket, turned my car on, and turned my blinker on.
No rapid clicking!
My blinker was safely working again.
Now, I don’t have to play chicken with oncoming traffic anymore.
What is The Moral of this Story?
The moral of the story is to make sure you pay attention; had I noticed such small, but significant, detail sooner, I wouldn’t have a stuck bulb in my headlights.
Most bulbs look very similar when you don’t have prior knowledge and have numbers on them; each car takes a different bulb, like how certain things take certain battery types. I was forcing a D-battery into a C-port.
The next time my front turn signal is in need of a new bulb, now I know which I would need to grab instead of grabbing anything and hoping for the best.
Final Thoughts
Fixing my turn signal took me about two hours, mostly because I didn’t realize my replacement bulbs were the wrong type. If I had checked the bulb type first, this probably would have been a five-minute job.
Still, I’m glad I tried fixing it myself.
I saved money, learned something about my car, and now I know exactly what kind of bulb my Dodge Dart needs the next time this happens.
Sometimes small problems look bigger than they really are. With a little patience, a flashlight, and a YouTube video or two, you might be able to solve them yourself.
And if not, at least you’ll understand the problem better before taking it to a mechanic.
If This Helped You
If this post helped you fix your turn signal—or at least helped you troubleshoot the problem—feel free to share it with someone else who might be dealing with the same issue.
I also write about DIY fixes, personal training over 280 weeks, personal finances on a $40K salary, and figuring things out through trial and error and a hint of stubbornness.
So if that’s your kind of thing, you can explore more posts here on The Stratagem’s Archive.
If you enjoy posts like this and want to help fund future experiments, troubleshooting guides, and DIY attempts, you can tap the little wave button below to visit my Ko-fi page.
I currently support the blog myself, but outside support is always appreciated.
Plus, it helps me to see if people dropped by and visited the archives, instead of bots doing their jobs and indexing.
Either way, thanks for reading—and drive safe.
One Last Thing
Have you ever tried fixing something on your car that should have taken five minutes… but ended up taking two hours?
Or have you run into the same issue with the wrong type of bulb?
Feel free to share what happened in the comments or share anonymously by clicking on the Tiny Wave button above. I’d be curious to hear how other people solved it.
Explore More DIY Articles Below
- I Had No Idea What I Was Doing, But I Still Fixed This Xbox 360 (With No EXP)
- Fitness Built For Real Life, By Real Life

Leave a comment